# How to Use a Cooking Thermometer for Perfectly Cooked Meals
## Introduction
Cooking thermometers are essential tools for any home chef who wants to achieve perfectly cooked meals every time. Whether you’re grilling steaks, roasting a turkey, or baking bread, a cooking thermometer takes the guesswork out of determining doneness. In this guide, we’ll explore how to use a cooking thermometer effectively to ensure food safety and optimal flavor.
## Types of Cooking Thermometers
Keyword: cooking thermometer
Before diving into usage techniques, it’s important to understand the different types of cooking thermometers available:
1. Instant-Read Thermometers
These provide quick temperature readings and are ideal for checking the doneness of meats, casseroles, and other dishes without leaving them in the oven.
2. Oven-Safe Thermometers
Designed to remain in food while it cooks, these thermometers are perfect for roasts and other large cuts of meat.
3. Probe Thermometers
These feature a probe that stays in the food while connected to a base unit outside the oven, allowing you to monitor temperatures without opening the door.
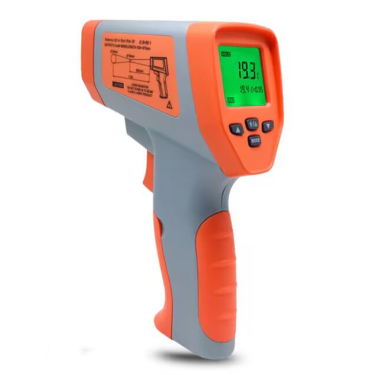
4. Infrared Thermometers
These non-contact thermometers measure surface temperatures and are great for checking grills, pans, and other cooking surfaces.
## Proper Usage Techniques
Step 1: Choose the Right Thermometer for the Job
Select a thermometer that matches your cooking method. For most home cooking, an instant-read thermometer will suffice for checking final doneness, while probe thermometers are better for monitoring cooking progress.
Step 2: Know the Correct Insertion Points
For meats, insert the thermometer into the thickest part, avoiding bones and fat. For poultry, check the breast and thigh areas. With roasts, insert the probe into the center of the thickest muscle.
Step 3: Wait for Accurate Readings
With instant-read thermometers, wait about 15-30 seconds for the temperature to stabilize. For digital models, wait until the display stops changing.
Step 4: Understand Safe Temperatures
Familiarize yourself with USDA-recommended safe minimum internal temperatures:
- Poultry: 165°F (74°C)
- Ground meats: 160°F (71°C)
- Pork, beef, veal, and lamb (steaks, chops, roasts): 145°F (63°C) with 3-minute rest
- Fish: 145°F (63°C)
## Maintenance and Calibration
Keeping Your Thermometer Accurate
To ensure your cooking thermometer remains reliable:
1. Regular Calibration
Test your thermometer’s accuracy by placing it in ice water (should read 32°F/0°C) or boiling water (should read 212°F/100°C at sea level). Adjust if necessary according to manufacturer instructions.
2. Proper Cleaning
Clean the probe with warm, soapy water after each use. Avoid submerging digital components unless specified as waterproof.
3. Safe Storage
Store your thermometer in a protective case to prevent damage to the probe and display.
## Advanced Tips for Perfect Results
Temperature Carryover
Remember that food continues to cook after removal from heat (car